Deployments and implementations may vary across organizations. We designed the following workflow to provide the tools that you need to develop your own internal plan to mitigate any affected devices. The workflow has the following steps:
- Identify affected devices. Search your environment for affected trusted platform modules (TPMs), keys, and devices.
- Patch the affected devices. Remedy effects on identified devices by following the scenario-specific steps that are listed in this article.
Note on clearing TPMs
Because trusted platform modules are used to store secrets that are used by various services and applications, clearing the TPM can have unforeseen or negative business impacts. Before clearing any TPM, be sure to investigate and validate that all services and applications that use TPM-backed secrets have been properly identified and prepared for secret deletion and recreation.
How to identify affected devices
To identify affected TPMs, refer to Microsoft Security Advisory ADV170012.
How to patch affected devices
Use the following steps on the affected devices according to your AAD usage scenario.
Azure AD join
- Make sure that a valid local admin account exists on the device or create a local admin account.
Note
It is a recommended practice to verify that the account is working by signing in to the device by using the new local admin account and confirm correct permissions by opening an elevated command prompt.
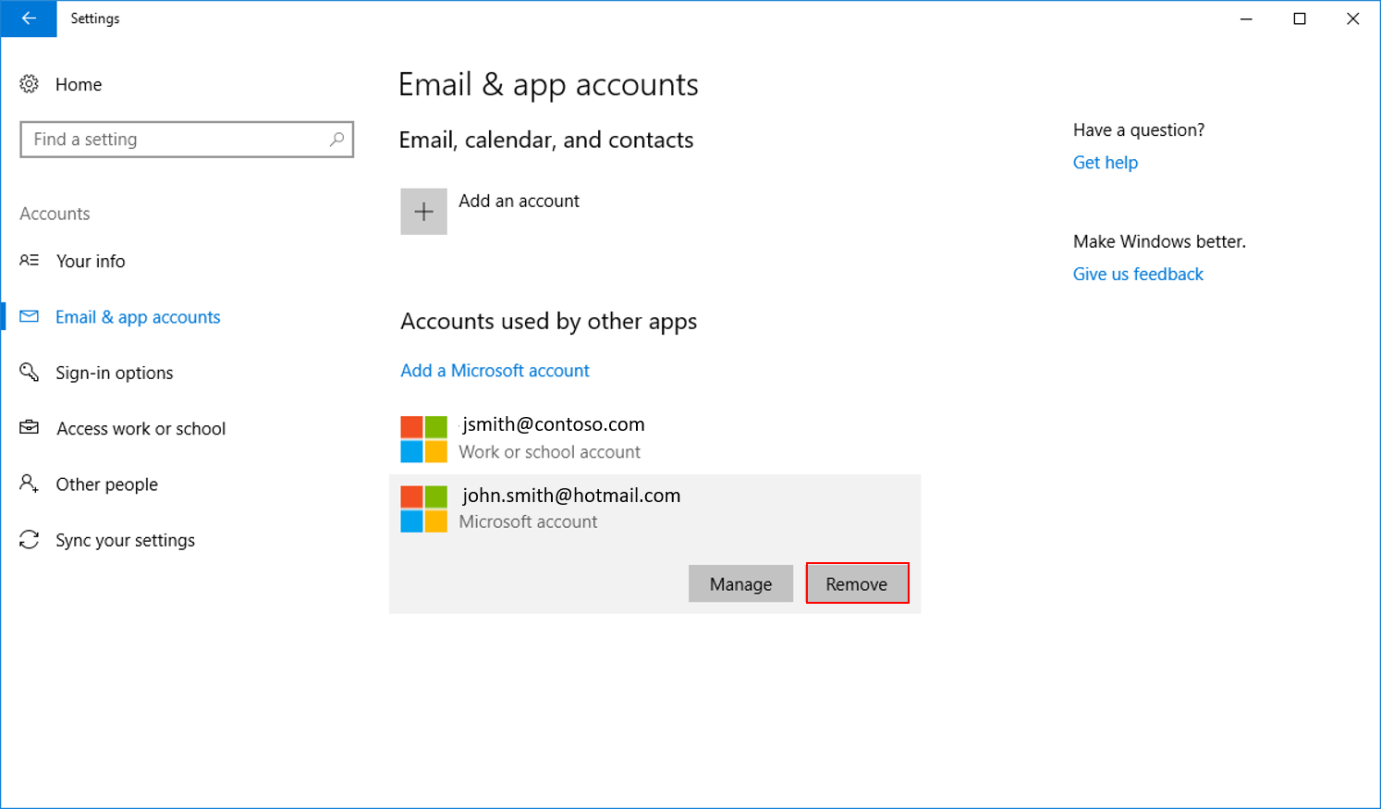
- If you have signed in with a Microsoft account on the device, go to Settings > Accounts > Email & app accounts and remove the connected account.
- Install a firmware update for the device.
Note
Follow your OEM’s guidance for applying the TPM firmware update. See step 4: "Apply applicable firmware updates," in Microsoft Security Advisory ADV170012 for information about how to obtain the TPM update from your OEM.
- Unjoin the device from Azure AD.
Note
Make sure that your BitLocker key is securely backed up somewhere other than the local computer before you continue.
- Go to Settings > System > About, and then click Manage or disconnect from work or school.
- Click Connected to <AzureAD> and click Disconnect.
- Click Yes when you are prompted for acknowledgment.
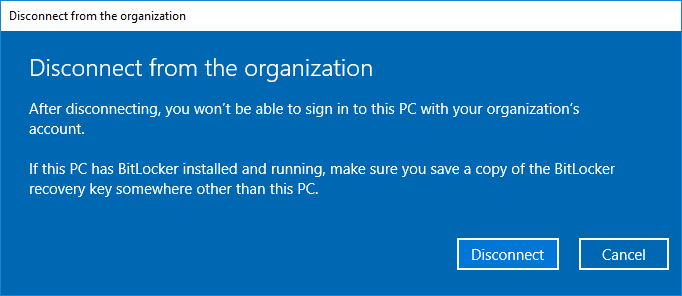
- Click Disconnect when you are prompted to "Disconnect from the organization."
- Enter the local admin account information for the device.
- Click Restart Later.

- Clear the TPM.
Note
Clearing the TPM will remove all keys and secrets that are stored on your device. Make sure that other services that are utilizing the TPM are suspended or validated prior to proceeding.
Windows 8 or later: BitLocker is automatically suspended if you use either of the two recommended methods for clearing your TPM, below.
Windows 7: Manual suspension of BitLocker is needed before proceeding. (See more information about suspending BitLocker.)
- To clear the TPM, use one of the following methods:
- Use the Microsoft Management Console.
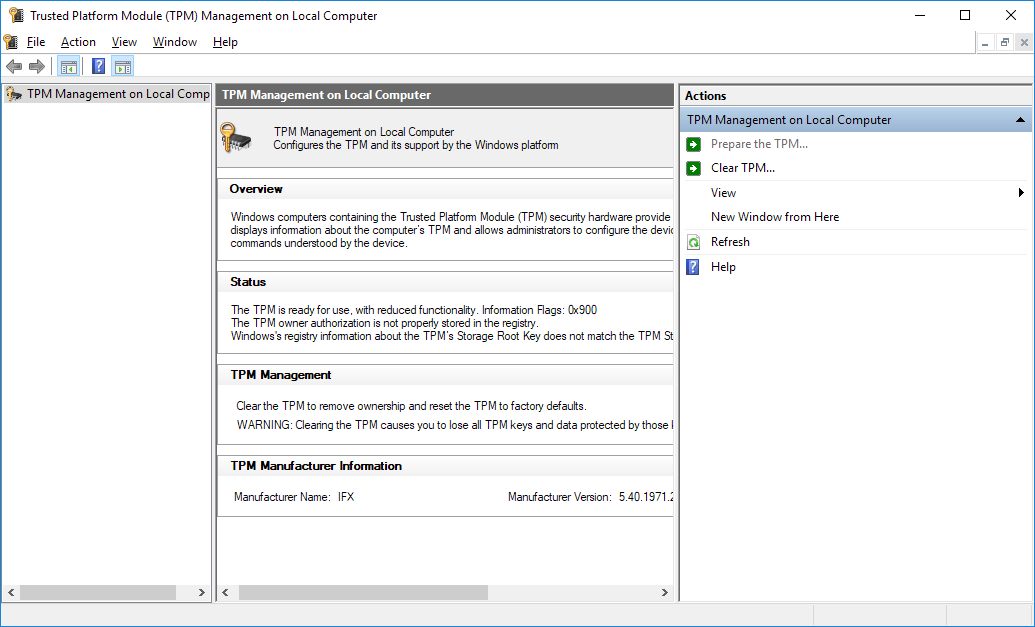
- Press Win + R, type tpm.msc and click OK.
- Click Clear TPM.
- Run the Clear-Tpm cmdlet.
- Click Restart.
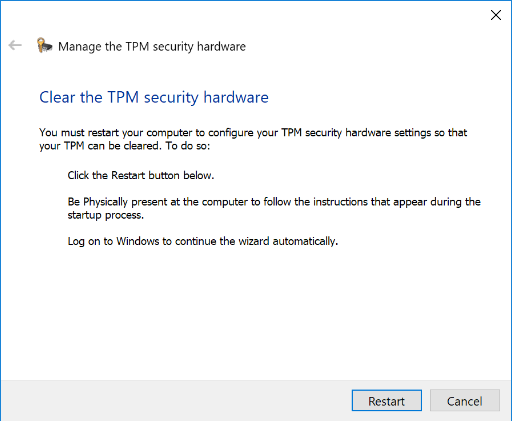
Note You may be prompted to clear the TPM at startup.
- After the device restarts, sign in to the device by using the local admin account.
- Rejoin the device to Azure AD. You may be prompted to set up a new PIN at the next sign-in.
Hybrid Azure AD join
- If you signed in by using a Microsoft account on your device, go to Settings > Accounts > Email & app accounts and remove the connected account.

- From an elevated command prompt, run the following command:
dsregcmd.exe /leave /debug
Note
Command output should indicate AzureADJoined: No.
- Install a firmware update for the device.
Note
Note Follow your OEM’s guidance for applying the TPM firmware update. See step 4: "Apply applicable firmware updates," in Microsoft Security Advisory ADV170012 for information about how to obtain the TPM update from your OEM.
- Clear the TPM.
Note
Clearing the TPM will remove all keys and secrets that are stored on your device. Make sure that other services that are utilizing the TPM are suspended or validated prior to proceeding.
Windows 8 or later: BitLocker is automatically suspended if you use either of the two recommended methods for clearing your TPM, below.
Windows 7: Manual suspension of BitLocker is needed before proceeding. (See more information about suspending BitLocker.)
- To clear the TPM, use one of the following methods:
- Use the Microsoft Management Console.
- Press Win + R, type tpm.msc and click OK.
- Click Clear TPM.

- Run the Clear-Tpm cmdlet.
- Click Restart.
Note You may be prompted to clear the TPM at startup.
When the device starts, Windows generates new keys and automatically rejoins the device to Azure AD. During this time, you may continue to use the device. However, access to resources such as Microsoft Outlook, OneDrive, and other applications that require SSO or Conditional Access policies may be limited.
Azure AD registered
Note If you use a Microsoft account, you must know the password.
- Install a firmware update for the device.
Note
Follow your OEM’s guidance for applying the TPM firmware update. See step 4: "Apply applicable firmware updates," in Microsoft Security Advisory ADV170012 for information about how to obtain the TPM update from your OEM.
- Remove the Azure AD work account.
- Go to Settings > Accounts > Access work or school, click your work or school account, and then click Disconnect.
- Click Yes in the prompt to confirm the disconnection.
- Clear the TPM.
Note
Clearing the TPM will remove all keys and secrets that are stored on your device. Make sure that other services that are utilizing the TPM are suspended or validated prior to proceeding.
Windows 8 or later: BitLocker is automatically suspended if you use either of the two recommended methods for clearing your TPM, below.
Windows 7: Manual suspension of BitLocker is needed before proceeding. (See more information about suspending BitLocker.)
- To clear the TPM, use one of the following methods:
- Use the Microsoft Management Console.
- Press Win + R, type tpm.msc and click OK.
- Click Clear TPM.
- Run the Clear-Tpm cmdlet.
- Click Restart.
Note You may be prompted to clear your TPM at startup.
- If you used a Microsoft account that has a PIN, you have to sign in to the device by using the password.
- Add the work account back to the device.
- Go to Settings > Accounts > Access work or school and click Connect.
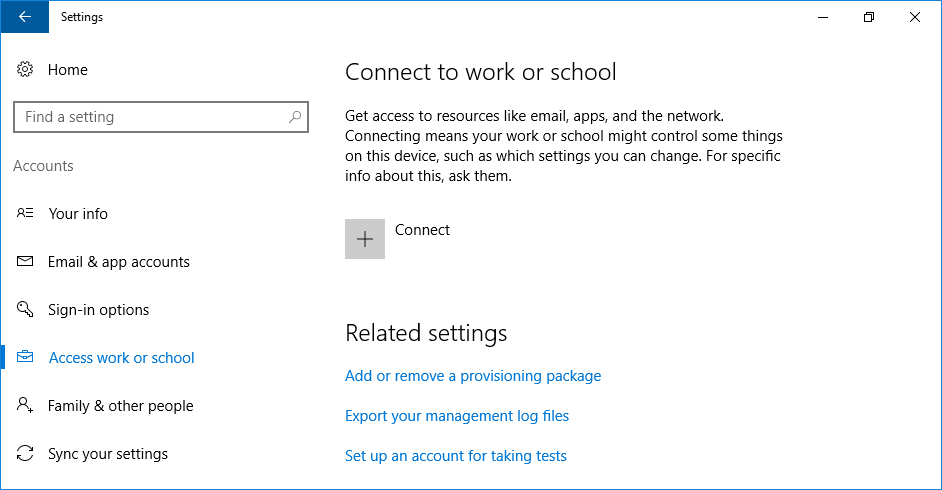
- Enter your work account, and then click Next.
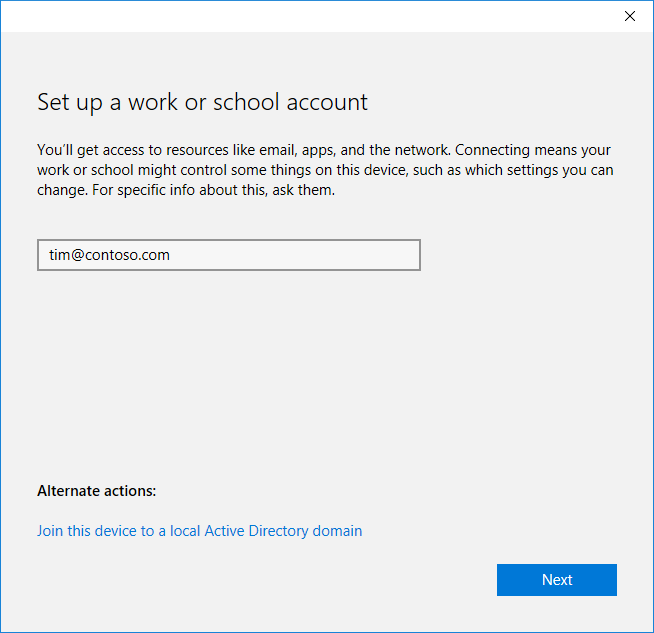
- Enter your work account and password, and then click Sign in.
- If your organization has configured Azure Multi-Factor Authentication for joining devices to Azure AD, provide the second factor before you continue.
- Validate that the information displayed is correct, and then click Join. You should see the following message:
You’re all set! We’ve added your account successfully You now have access to your organizations apps and services.