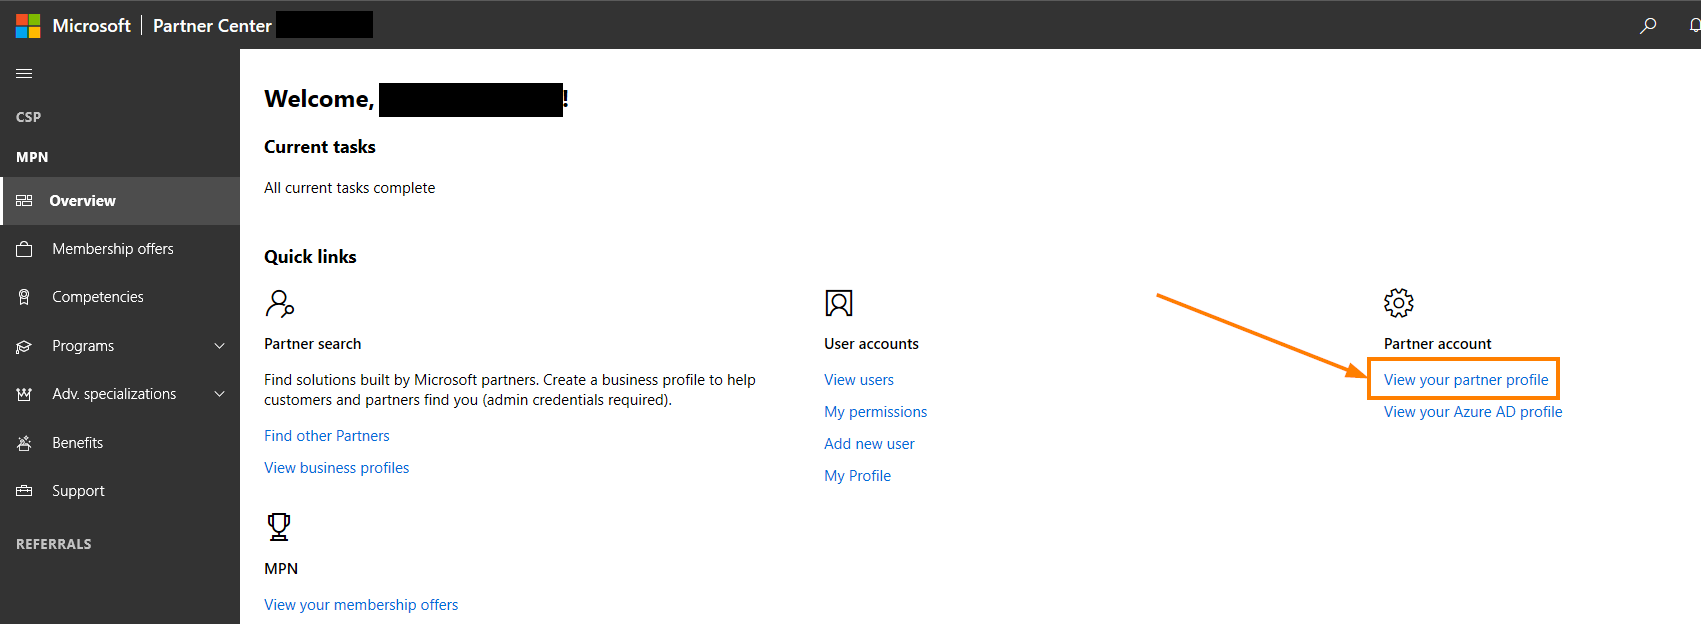
1. After successfully Signing In with your work account on the Partner Portal, access your Dashboard.

2. Once in your Partner Center dashboard, click on the View your partner profile hyperlink.

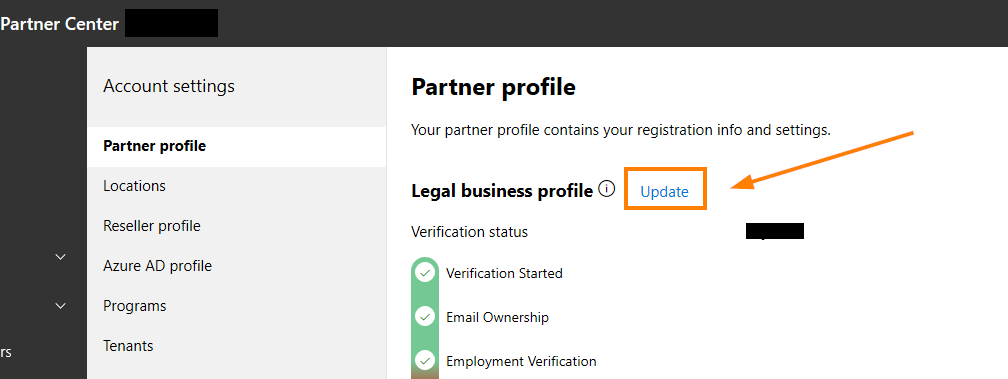
3. Click on the Update hyperlink inline with your Legal business profile.

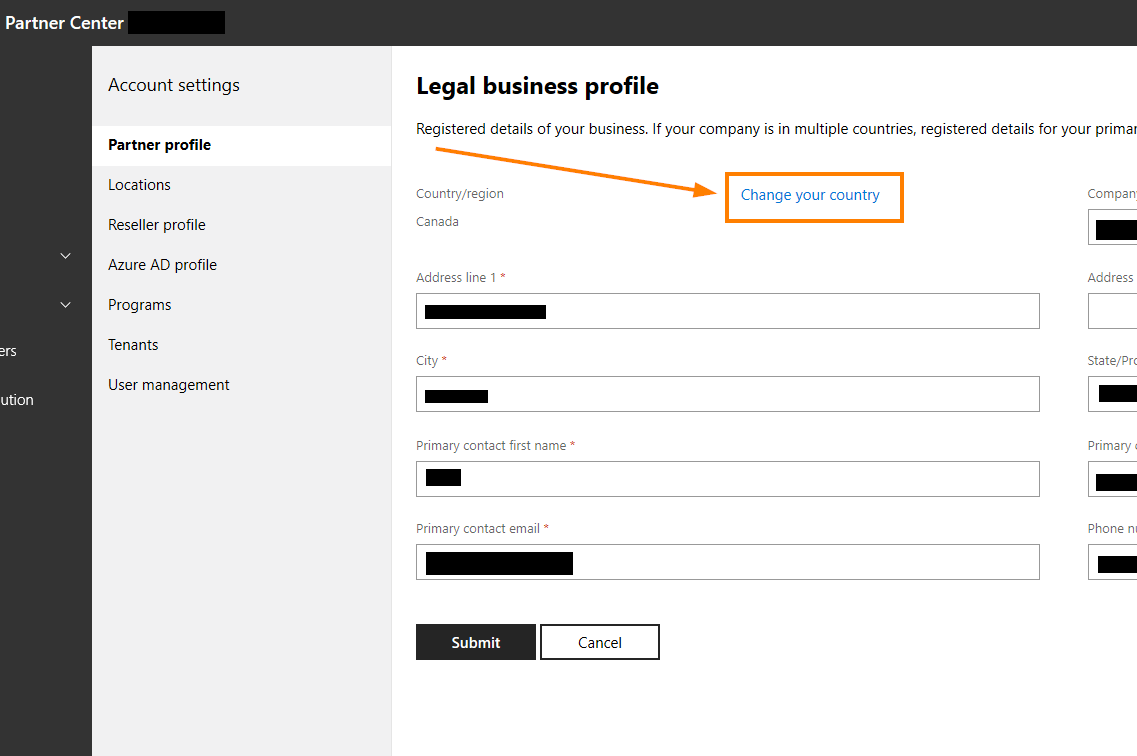
4. In the next screen you will be able to change the general details of your legal business profile, as well as by clicking the Change your country hyperlink, that will allow you to choose the country that needs to be setup as your primary place of business amongst the locations you have available in your account.
Note: Make sure that when you change the details for your legal business profile:
- The zip code matches the indicated address.
- The telephone number does not include special characters, country code, spaces or is longer than 10 characters.
- If the Company name is flagged as a duplicate, the name of the company can be tweaked (e.g. from “Contoso” to “Contoso Limited”) to bypass the check.
- In the State/Province field, for some countries a dropdown menu will appear to choose the state/province, where for other countries, the name will be inserted manually. When inserting the State/Province name manually, no special characters should be used.

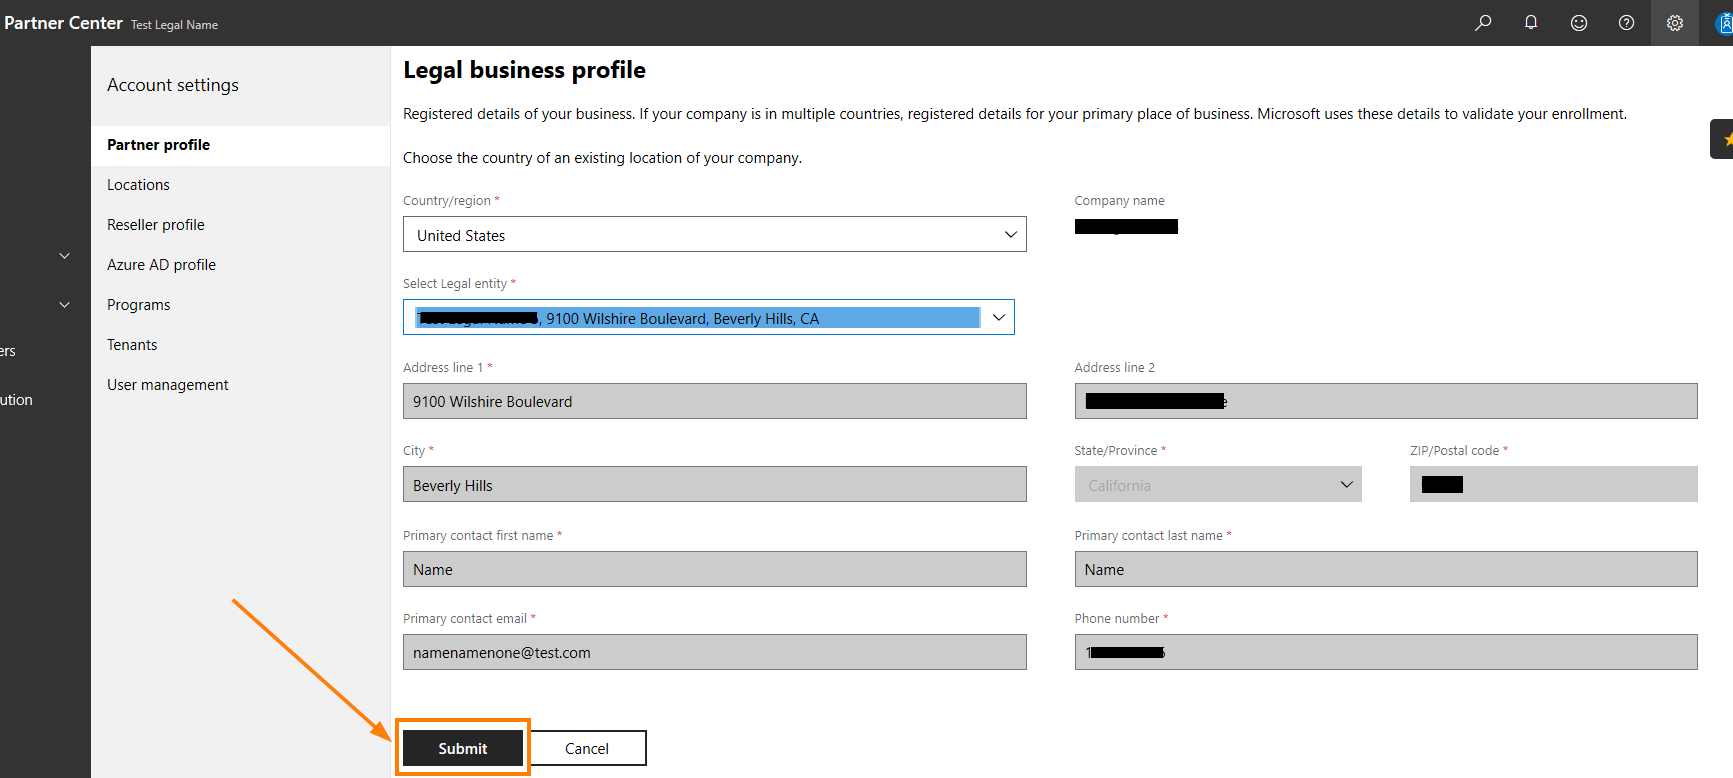
5. You will be prompted to choose the country of an existing location of your company’s account, from the drop down menu, that you want to appoint as the primary place of business.

6. In the next dropdown menu, you need to choose the address of the Legal entity location, in the selected country, that you want to appoint as the primary place of business.

7. After choosing the needed Legal entity and Country from the dropdown menu, you will need to confirm your choice by clicking the Submit button.
Please note that the fields reflecting the Address cannot be edited in this screen.

8. After successfully submitting the changes, the new primary place of business will reflect accordingly under your Partner profile.
This feature will not work if there are multiple tenants associated to your account in PC.