Notice: This website is an unofficial Microsoft Knowledge Base (hereinafter KB) archive and is intended to provide a reliable access to deleted content from Microsoft KB. All KB articles are owned by Microsoft Corporation. Read full disclaimer for more details.

Error 0x80070057 when you format a hard disk drive to install Windows 7


View products that this article applies to.

Symptoms

You receive error 0x80070057 when you try to clean install WIndows 7.

↑ Back to the top


Cause

This error occurs because the partition that is reserved for system is damaged.

error

Note: the reserved system partition is an area reserved for the BitLocker encryption and for the restoration of Windows.
 

↑ Back to the top


Resolution

To resolve this problem, delete the existing partitions, create a new partition, and continue with the formatting. To do this, follow these steps:
 
  1. Insert the Windows 7 installation DVD, and then start the installation.
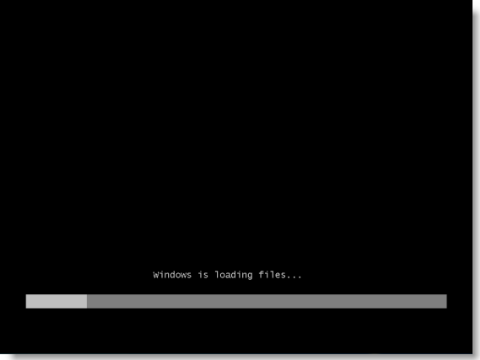
    Insert the Windows 7 installation DVD, and then start the installation.
  2. Select your preferences in the Language to install, Time and currency format and Keyboard or input method options. Then click Next .
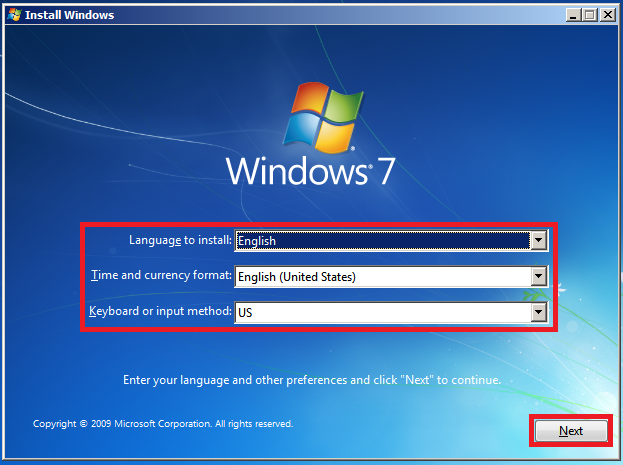
    Keyboard or input method
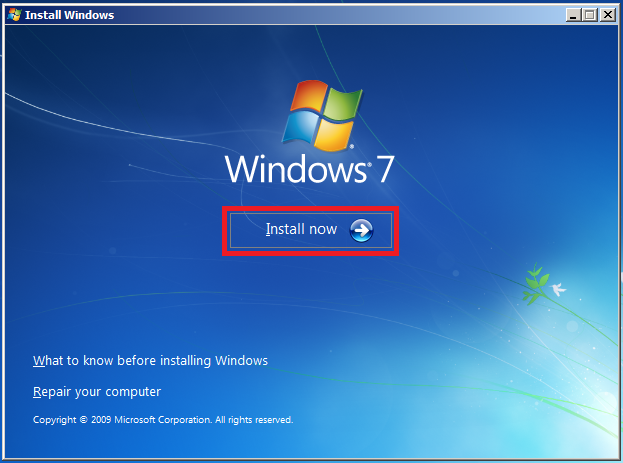
  3. Click Install now.
    Install now
     
  4. In the screen of the Microsoft license agreement, click I accept the terms of license, and then click Next .
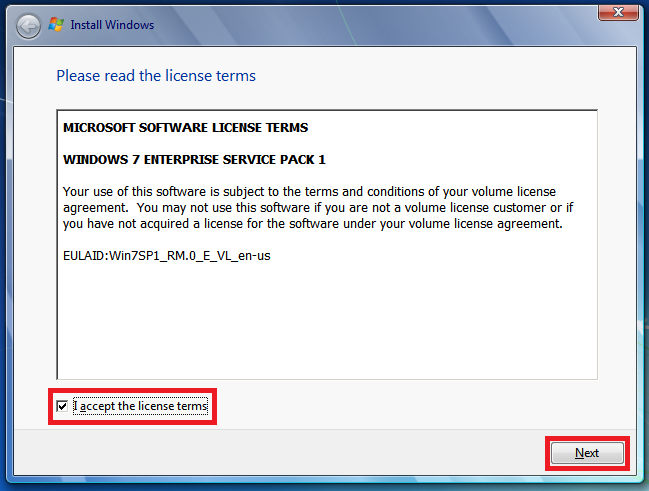
    I accept the terms of license
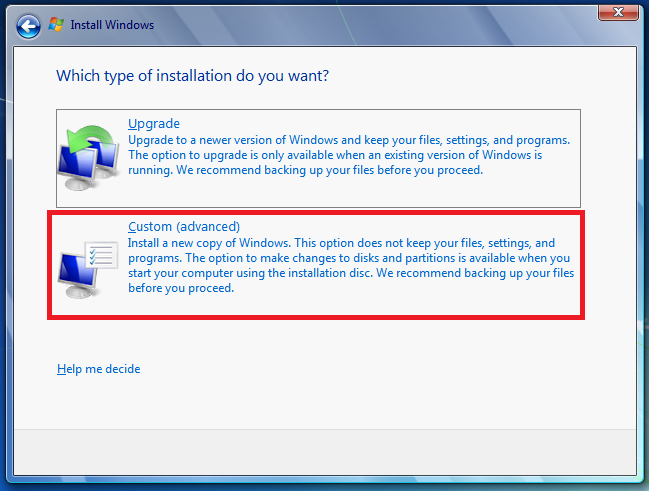
  5. Click Custom (Advanced).
    Custom (Advanced)
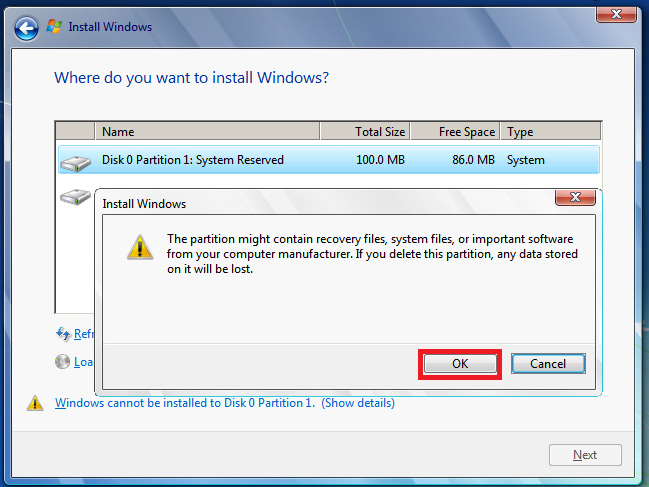
  6. Select Disk 0 partition 1, and click Delete.
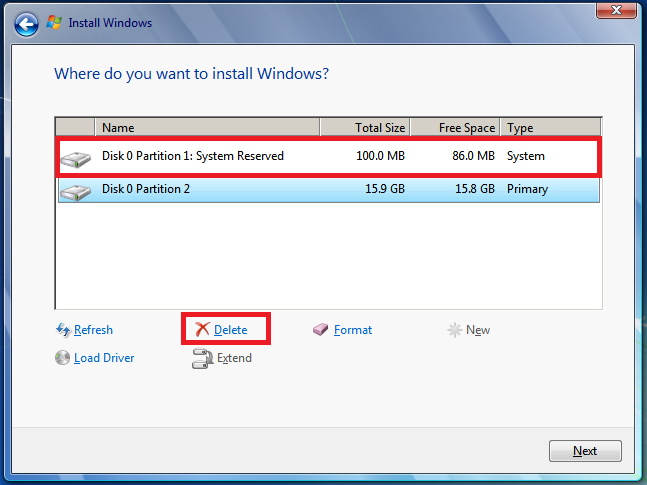
    Select Disk 0 partition 1, and click Delete.
     
  7. Click OK when propmted.
    Click OK when propmted
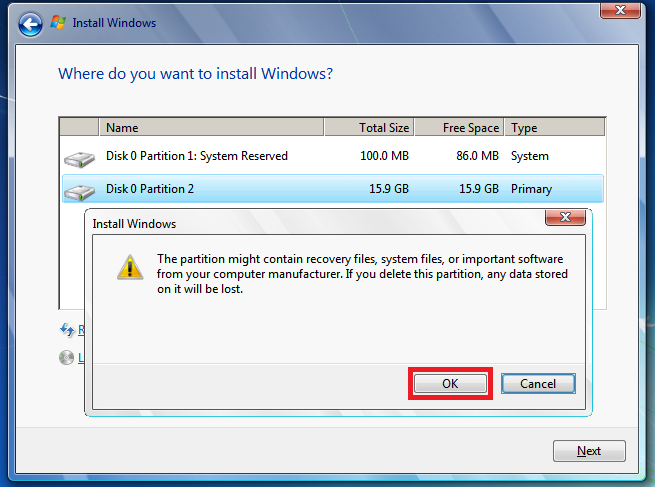
  8. Select Disk 0 partition 2, and click Delete.
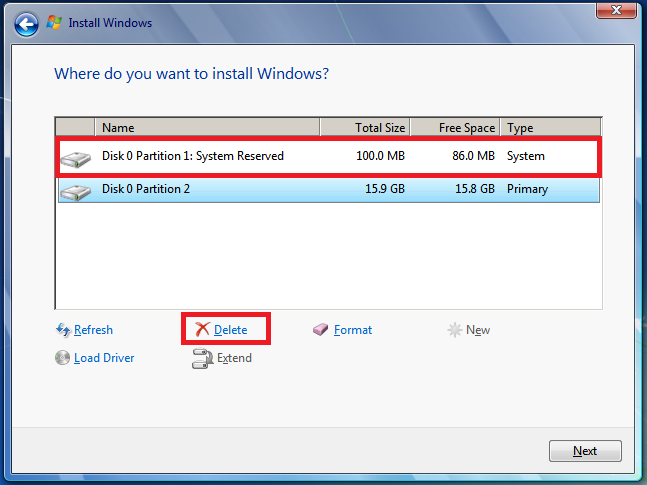
    Select Disk 0 partition 2, and click Delete.
     
  9. Click OK when propmted.
    Click OK when propmted.
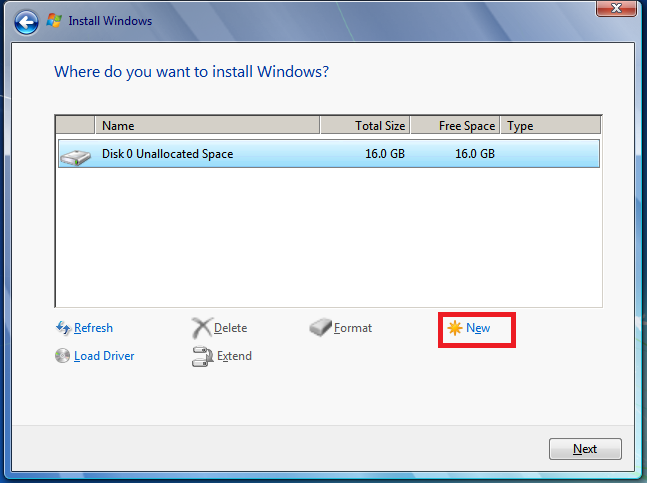
  10. Click New.
    Click New
  11. Define the size of the disk, and then click Apply.
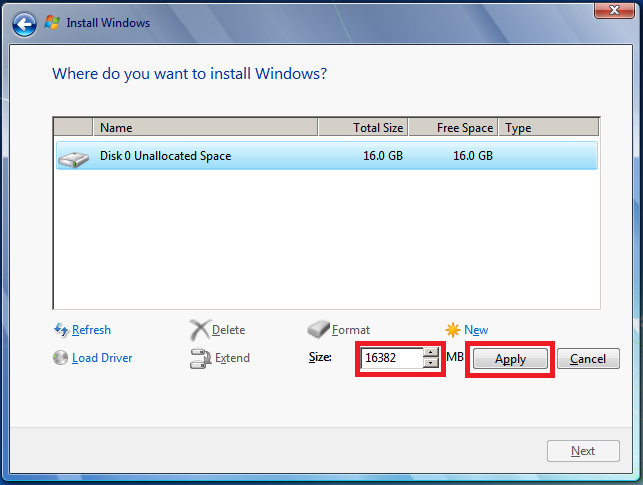
    Define the size of the disk, and then click Apply.


    Note: the size of the default value is the maximum size of the disk.
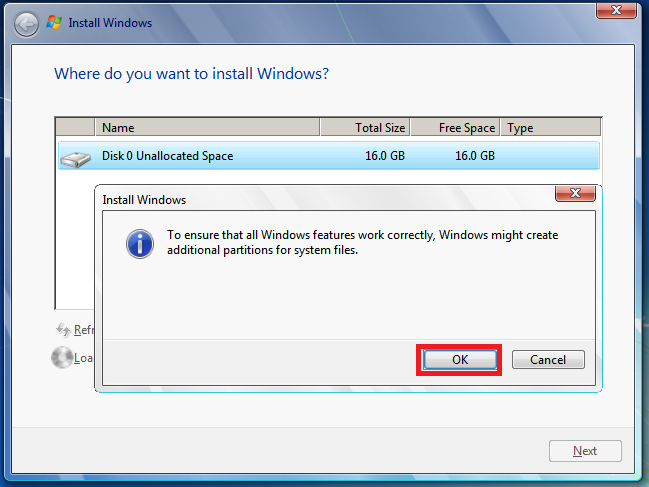
  12. Click OK when propmted.
    Click OK when propmted.
     
  13. Select Disk 0 partition 2, and then click Formatting.
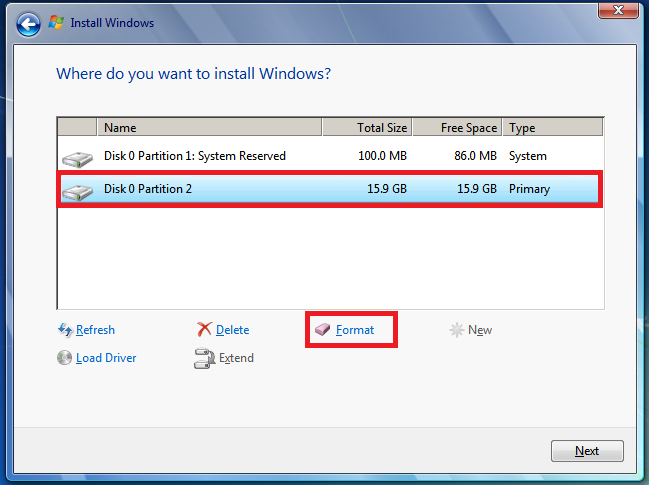
    Select Disk 0 partition 2, and then click Formatting.
     
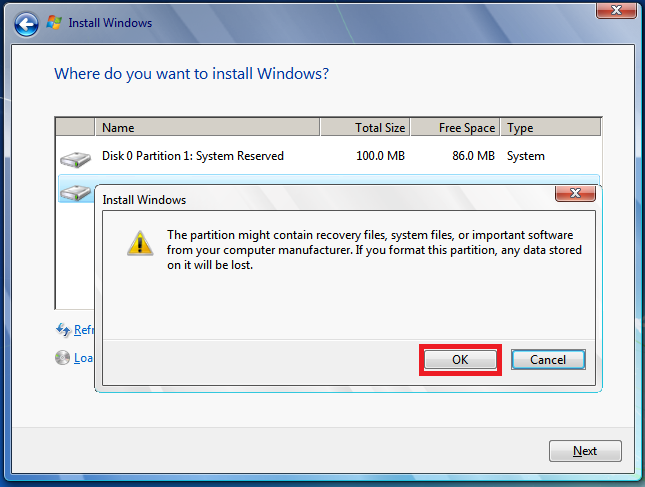
  14. Click OK when propmted.

    Click OK when propmted.
  15. Formatting should complete correctly. Click Next to continue.
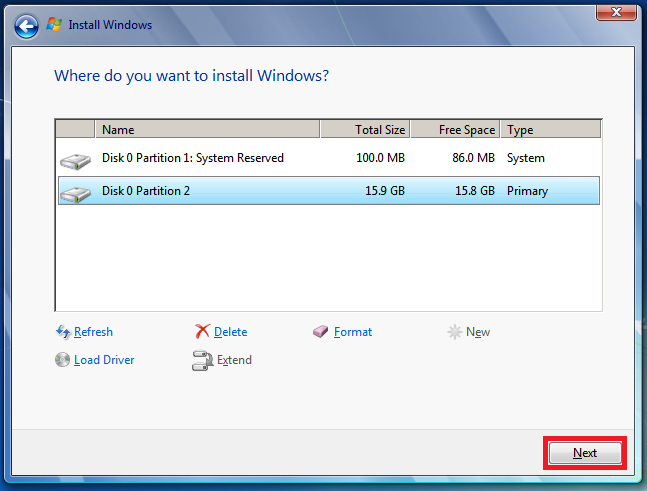
    Formatting should complete correctly. Click Next to continue.


    You can now complete the installation without problems.

Your opinion interests us : Do not hesitate to tell us what you think of this article by using the comment field located at the bottom of the document. This will allow us to improve the content. Thank you in advance !

↑ Back to the top


Keywords: kbstepbystep, kbtshoot, kb

↑ Back to the top

Article Info
Article ID : 2476568
Revision : 2
Created on : 10/26/2017
Published on : 10/26/2017
Exists online : False
Views : 250